Most homeowners who read a case study about stair glass railings are not browsing. They have a staircase, a budget, a contractor or interior designer waiting for an answer, and one nagging question:
will this actually work in my house, and who can I trust to do it properly? Brochures cannot answer that. A real project can.
This case study walks through a luxury villa where we planned, fabricated and installed stair glass railings from first site visit to final handover. We cover the decisions that mattered, the numbers behind them, the problems we avoided and what the owner said at the end. If you are at the stage of comparing suppliers, use it as a yardstick. By the time you finish, you should know what a well-run stair glass railings project looks like, what it costs, how long it takes and which questions to put to any supplier, including us.
Worth Noting This case study is a representative project profile. Client identity, exact dimensions and figures are generalised to protect privacy and are indicative, not a fixed quotation. Your own price depends on your measurements and specification.
Project Snapshot
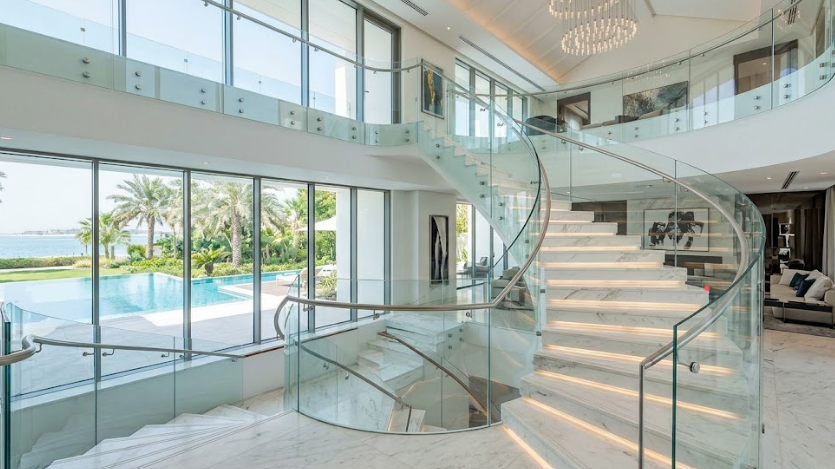
The villa was a newly built, four-bedroom residence in Lahore with a double-height entrance lobby. The staircase was the centrepiece of the home, visible from the front door, the lounge and the upper-floor corridor. The owner chose stair glass railings so the staircase would look light and open, not boxed in by balusters.
The Brief: Why the Owner Chose Stair Glass Railings
The owner’s written brief was short: a clean, modern glass railing that matches the marble stairs and the lobby lighting. But in the first meeting, the real priorities came out, and they are worth listing because they are common to almost every villa client we meet.
- Safety with small children. Two young grandchildren visit often. The owner wanted glass that would not shatter into pieces if struck.
- No surprises on price. A previous renovation had gone over budget through add-ons. This time the owner wanted an itemised quote.
- Appearance over time. No yellowing, clouding or rust streaks at the base within the first few years.
- A fixed schedule. A family event was planned, so handover could not slip.
- Accountability. One company responsible for measurement, glass, hardware and installation.
Notice that none of these is about glass thickness or hardware catalogue numbers. Buyers at the decision stage are managing risk: safety risk, cost risk, schedule risk and the risk of choosing the wrong company. Our approach was built around closing each of those risks in writing.
Choosing the Glass for Stair Glass Railings: Why Laminated Won
The first technical decision was the glass type. We presented three options, and the comparison below is the same one we give every villa owner.
For a family with young children, laminated glass was a straightforward decision. Stair glass railings are barriers that people may lean on, trip into or bump with a bag, and the failure mode matters. Tempered glass is far stronger than ordinary glass, but if it does fail, the whole panel can break and leave a gap. Laminated glass holds together because the interlayer grips the fragments, so the barrier remains a barrier even when damaged. That behaviour is why we recommend laminated glass for stair glass railings in occupied homes.
Thickness and clarity
We specified a 12 mm build, made from two layers bonded together, for the stair panels. Thicker glass feels reassuringly solid underhand and resists flexing, which also keeps the movement at the top edge low. We chose low-iron clear glass because standard clear glass has a green tint that becomes visible at the edges, especially against white marble. Low-iron glass looks almost colourless, so the railing reads as light, not as a green-edged barrier. It costs more, and in a lobby this visible we judged it worth the difference.
Edges and finish
All edges were polished flat and arrised, meaning the sharp corners were softened. Exposed edges are the part of a glass railing that people touch and see up close, so poor polish is noticed immediately. Our
laminated glass installation work always includes edge inspection before panels leave the workshop.
Choosing the Stair Glass Railing System
The second decision was how the glass would be held. The site offers frameless, semi-frameless and stainless-steel supported systems, and each suits a different situation.
Frameless base-channel on the main stair
On the main staircase, the owner wanted the least visible hardware possible. A base-channel system sets the glass into a metal channel fixed to the edge of each step or slab, then locks it in place so that nothing but glass is visible from the side. It is the most elegant look and gives the most open view of the marble treads. It also demands the most accurate site measurements, because a stair is not a perfect rectangle and the channel must follow the slope of the flight exactly.
Semi-frameless on the mezzanine
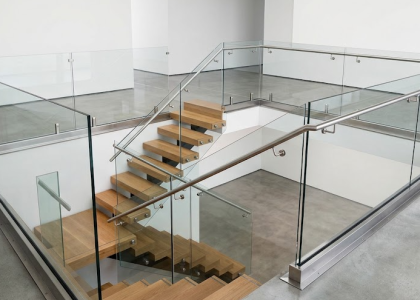
On the flat first-floor mezzanine balustrade, we used a semi-frameless approach with a slim stainless-steel top rail. Level runs are simpler to build than sloped flights, and the top rail added a comfortable gripping surface where people stand and look down into the lobby. It also allowed a sensible saving, so the budget could be directed to the stair where the visual impact was highest.
Wall-side handrail
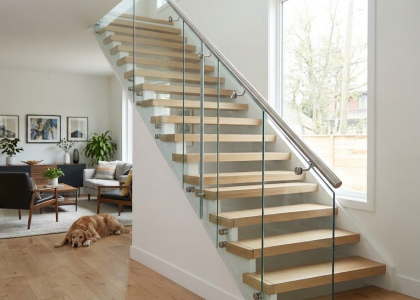
Building codes and common sense both favour a graspable handrail on a stair. We fixed a brushed stainless handrail on the wall side, so people climbing could hold something sturdy while the glass side stayed completely clear. Owners sometimes assume a handrail ruins the minimalist look on the wall side it almost disappears.
Worth Noting Stair glass railings do not have to be all glass. Where you place the structural support, the handrail and the channel decides both the cost and how safe the staircase feels in daily use. Ask for a drawing of the support system, not only a photo of a finished railing.
Site Visit, Measurement and Design
Our process starts with a site visit and consultation, followed by design and material selection, fabrication, delivery, installation and final inspection. On this project the site visit took place when the stair slab was poured but before marble cladding, which is the ideal moment and a point we return to in the lessons below.
What we measured
We recorded the length and angle of every flight, the height from tread to top rail, the step rise and going, the slab edge thickness and the position of the wall. We also noted finished-floor levels, because the marble and the underlay would add thickness that the bare slab did not show. Panels for a stair are cut as a series of parallelograms or stepped pieces, so a few millimetres of error at the base becomes a visible gap at the top.
Templates and sign-off
For the stair flight, we made a physical template of the staircase edge after the marble was fixed. Then we produced a drawing of every panel, with dimensions, hole or channel positions and the support layout, and sent it to the owner and the interior designer for sign-off. Nothing was cut until the drawings were approved in writing. This step felt slow to the owner at the time, and it was the reason the glass fitted on the first attempt.
Safety checks in the design
We confirmed the railing height against the usual residential practice for stairs and landings, checked that gaps between panels were small enough to stop a small child slipping through, and verified that the anchor points were in sound structural concrete, not in plaster or tile. Our service is built around safety and load standards, and these checks are part of the design record we leave with the client.
Planning a villa staircase? Send your drawings or photos and we will advise on glass, system and budget before you commit.
Fabrication and Delivery
Once the drawings were approved, the glass moved into fabrication: cutting to size, polishing the edges, drilling or notching where needed, tempering in a furnace and lamination. Tempered glass cannot be cut or drilled after tempering, so every dimension must be right before the panel goes into the furnace. That is the central reason measurement discipline matters so much a mistake cannot be fixed on site by trimming the glass.
Quality checks before dispatch
Each panel was inspected for scratches, chips, bubbles in the interlayer, edge polish and dimensional accuracy. We matched the numbered panels against the drawing, so each piece had a position on the staircase. Spare panels were not required, but we always keep the cutting data on file in case a replacement is ever needed years later.
Protected transport
Glass is delivered in protective crating, upright on padded A-frames, and carried to the villa on a vehicle suited to long panels. The stair panels are heavy and awkward, so the route into the house, door widths and lift availability were agreed in advance. Our delivery covers Lahore, Karachi, Islamabad, Rawalpindi and other major cities, with the same crating standard everywhere. The cost of crating is small compared with the cost of replacing a broken 12 mm laminated panel and losing a week.
Installation, Day by Day
Installation is where a well-planned project either proves itself or falls apart. The villa was occupied by tradespeople finishing other rooms, so we coordinated carefully with the site manager. The timeline below was within our usual range of 7 to 12 working days for projects of this kind, with the larger stair pushing us toward the upper end.
What the owner saw
The owner visited on day six and was surprised by how orderly the work was. There was no dust cloud, no stray offcuts and no glass lying around unprotected. Panels were lifted by a team using suction handles, then wedged level and locked before the next one went up. The channel was sealed only after the alignment was checked against the string line, so the top edge ran in one smooth line from the lobby to the landing.
Final inspection and handover
On the last day, we walked the staircase with the owner and the interior designer. We tested the handrail, pressed against the panels, looked at every edge and checked the base for sealant neatness. A short snag list was produced and closed the same afternoon. The owner received a handover summary, care instructions and warranty details. The whole process follows the same inspection and handover sequence listed on our service page.
What Stair Glass Railings Cost in a Luxury Villa
Pricing is where many buyers feel most nervous, so here is how the quotation was structured. Installation is priced per running foot, depending on glass type, railing system and complexity. This villa sat toward the upper-middle of our range because of the low-iron laminated glass and the frameless channel on the main stair. Exact figures are always given in a written quote after the site visit.
Why the two rates differ
The stair costs more per foot than the mezzanine for three reasons. The glass panels are stepped and individually templated, the channel must follow the slope, and installation takes longer on an incline. Level runs use simpler, repeatable panels and a lighter support system. Splitting the quote this way made each decision visible to the owner, who chose to save on the mezzanine rather than compromise the main stair.
Where the budget could have been cut, and where it was protected
If the owner had wanted to lower the price, three options were on the table standard clear glass instead of low-iron, a steel-post system for the stair instead of frameless, and a thinner build. We recommended against the third. Reducing thickness on a staircase saves money but changes how solid the railing feels, and that is the one thing a family cannot easily fix afterwards. The first two were acceptable trade-offs, and the owner chose to keep both upgrades.
Worth Noting Always ask for supply, installation, handrail and delivery as separate lines. A quote showing only a single per-foot figure hides what is and is not included, and the gap usually appears as a variation order near the end.
If you are comparing ranges before getting a proper quote, our guide to
glass staircase railing costs explains the pricing factors in more detail.
Results: How the Stair Glass Railings Performed After Handover
A case study is only useful if it reports what happened afterwards. Here is what we found at the follow-up visit and what the owner reported.
- Safety and confidence. The family felt the railing was solid. Pressing against panels produced no visible movement, which was the owner’s main test during the walkthrough.
- Light and space. The lobby felt larger and brighter. With glass instead of balusters, natural light reached the lower flight, and the marble treads were visible from every angle.
- Maintenance. Routine cleaning with a soft cloth and a non-abrasive glass cleaner was enough. The channel sealing stayed neat, with no staining at the base.
- Schedule. Handover was completed ahead of the family event, with margin to spare for the interior designer to finish styling.
- Cost. The final invoice matched the approved quotation, with no variation orders.
The owner told us the best part was that the staircase no longer looked like construction. It looked like part of the architecture. In a luxury villa, that is the outcome you are paying for.
Lessons for Your Own Stair Glass Railings Project
Every project teaches us something, and several lessons from this one apply to almost any staircase. Treat them as questions to put to every supplier you are considering.
- Involve the glass supplier before the marble. The ideal time for a first site visit is when the structure is complete but the floor finishes are not. Early input lets us advise on slab edge details, channel positions and finished levels, which avoids rework.
- Insist on a signed drawing. A supplier who cuts glass without approved drawings is gambling with your money. Tempered glass cannot be modified after it leaves the furnace.
- Choose laminated glass for stair glass railings. The additional cost is small compared with the safety benefit, particularly in homes with children, elderly relatives or frequent guests.
- Match the system to the location. Spend on frameless where it is seen most and use a simpler system on level runs.
- Do not forget the handrail. It is part of comfort and safety, not an afterthought.
- Get the quote itemised. Supply, installation, handrails, delivery and any extras should each appear as a separate line.
- Ask about warranty in writing. Know what is covered, for how long and who attends if something needs attention.
- Check completed work. Look at similar finished staircases on our project references page and ask to speak to past clients.
Stair Glass Railings vs Steel vs Wood Railings
Some villa owners ask whether glass is the right choice at all. It depends on the look you want, how much light you want to keep and how much upkeep you accept. This table shows how the three most common options compare.
For a contemporary villa where the staircase is a focal point, stair glass railings are hard to beat, particularly when light and the sense of space matter. Where budget is tight or the style is traditional, a different material may be more sensible, and we will say so honestly. A good supplier recommends what suits the house, not only what they sell.
Checklist Before You Request a Quote
Gather the following before you request a quote for stair glass railings. It speeds up quotes and makes them easier to compare.
- Staircase drawings or photos. Plans, sections or a few clear pictures from different angles.
- Approximate length. Total running feet of stair and landing or mezzanine.
- Construction stage. Slab only, finished marble or already occupied.
- Preferred look. Frameless, semi-frameless or steel-supported.
- Glass preferences. Clear, low-iron, frosted or tinted, and laminated or tempered.
- Handrail needs. Wall-side, top rail or none.
- Who lives there. Children, elderly family members or frequent guests.
- Delivery city. This affects logistics and installation scheduling.
- Deadline. Fabrication and installation take time, so share any event dates early.
- Itemised pricing. Request supply, installation, handrail and delivery as separate lines.
Frequently Asked Questions
1. How is a glass railing for a villa staircase priced in Pakistan?
Pricing is per running foot and depends on glass type, railing system and complexity. Frameless systems with laminated low-iron glass sit toward the higher end. Send us your drawings on WhatsApp for an exact, itemised quote.
2. Are stair glass railings safe in a home with children?
Yes, when you use laminated or tempered safety glass of the right thickness, properly anchored. Laminated glass is our recommendation for family homes because the panel stays in place if one layer is damaged.
3. How long does stair glass railing installation take?
Most projects are completed in 7 to 12 working days, depending on size and customisation. The villa in this case study took 11 working days on site.
4. When should I involve the glass supplier?
As early as possible, ideally when the stair structure is complete but before the floor finishes. That allows correct allowance for finished levels and channel positions.
5. Can I customise the glass?
Yes. Options include frosted, tinted and etched glass, with stainless steel or aluminium supports, and frameless or semi-frameless systems.
6. Do I still need a handrail with stair glass railings?
We strongly recommend one on a stair. A wall-side handrail keeps the glass side clear while giving people something solid to hold.
7. How do I clean and maintain stair glass railings?
Wipe with a soft cloth and a non-abrasive glass cleaner, applying the cleaner to the cloth and not directly at the base channel. Avoid harsh chemicals and abrasive pads.
8. Do you install stair glass railings outside Lahore?
Yes. We handle projects in Lahore, Karachi, Islamabad, Rawalpindi and other major cities across Pakistan.
9. Why do quotes from different suppliers vary so much?
Glass type, thickness, edge finish, hardware quality, handrail inclusion and installation scope all change the price. Compare specifications line by line before comparing totals.
10. What happens after installation?
You receive a final inspection, handover with care instructions and warranty support, so any later concern has a clear point of contact.
Turning This Stair Glass Railings Case Study Into a Confident Decision
The success of these stair glass railings did not come from one clever product. It came from a sequence of sound decisions: laminated glass for safety, the right system in the right place, early measurement, signed drawings, protected delivery, careful installation and an honest, itemised quote. Each step removed a risk for the owner, and together they produced a staircase that looks effortless.
If your villa, hotel or commercial space needs the same result, start with the details in the checklist above, then speak to our team. You can read more about our
staircase glass railing installation service, browse the
stairs glass railing product range, or look through our
custom glass railing installations for more examples.